
Sophomore Reviews
Wednesday, December 17, 2025
9:00am–3:00pm
Your Pannelists
Angela
Maya
Julia
Caley
CD Alum, Art Ed Master’s Student
CD Senior
CD Junior
CD Junior

Ask the Pannelist
Tell us your experience preparing for reviews
at the end of your sophomore year.
Angela
Maya
Julia
Caley
I remembered feeling a little bit stressed out because the first time hearing about “review” seemed pretty scary and overwhelming. I was worried about whether I would have everything I needed in both digital and print-outs ready in time. But I definitely thought that as the date approaches and as I gather my materials week by week, the stress will lessen a bit. The very first review was definitely a time of trial and error (seeing what worked and what didn’t), exploring and finding your pacing and style through the process. Spring review went much more smoothly because I better understood the review process and knew what to expect.
My first mistake in the fall was that I tried to prepare all of my labels, nameplate, and documentation in the dorms. I wasn’t with any of my classmates, and I was surrounded by roommates who didn’t even have to stress about reviews. In the spring, I made sure I was set up at a space in the DS9 with printers and any resources I would need to prep my work for setup. I was also surrounded by classmates who kept me on schedule, and I could see different methods of displaying my work. Being around people who were also preparing for this event helped me feel less isolated and stressed out. I felt so proud of the work I had made and felt more in control over my review experience.
I was definitely stressed after the October intersession. Things started picking up fast around midterms and the concept of collecting everything for reviews was so overwhelming to me! This feeling is normal, and it’s good to remember your peers are in the same boat. In the grand scheme of things, it was so satisfying to set everything up, take a step back, and see all the work I’ve completed for the semester. Everything came together in the end, and the lessons I learned during fall reviews/finals were a game changer when spring came around.
It was very overwhelming to make sure I had everything done. Between binders, final prints, google drive uploads, google classroom submissions, name tags/design labels, I remember getting extremely stressed out. Doing something for the first time is gonna be frustrating, but I was able to have a much better experience in the spring semester by learning what did and didn’t work in the fall. Reach out to ARC! They can help manage tasks.
Do’s and don’t’s for getting everything together for the review space and google drive.
Angela
Maya
Julia
Caley
Do
- Gather everything week by week, as you approach the actual date and don’t save it until the last minute. (Buying materials, go early, might sold out)
- Google Drive: Keep up with naming conventions (this really makes things easier when you submit your finals digitally), organize your files by creating folders on your desktop for process and final (for example. “Sophomore fall process”/ “Sophomore fall final”)
- Review Space: Consider what is the “safest” way for you to carry all of your work to your setup table. For me, I had a big plastic bin that I bought for every review to put my works in because it’s waterproof and it can protect all of the work from being lost and damaged. Unexpected things could happen, so really making sure to find a way to keep it safe. (Commuting long distances, crossing the road from dorm to DMC with unexpected weather, wind and rain).
- Bring a hammer!!! And lots of push pins!!! The walls might be really hard to pin in and I highly recommend bringing something to hit with (thick glue stick works too).
- Print out your name nice and big, so it is easy for reviewers to recognize who you are!
- Have fun! Play with fonts and design your space!
Don’t
- Don’t print out your work/mount labels on the day of the setup because even though it is 24-hour access but the Print Lab is not (closes around 6?) and likely there will be a very long line waiting for printing. (But it is there if you forget anything).
Do
- Make a Master List of everything you need to show at your review, including documentation, process, labels, and nameplate. THEN write a plan/schedule of things that need to happen in order for these projects to make it into your submission folder/ binders.
- Talk to your classmates about what they plan on/ when they plan on working on their review materials. Making this a communal experience is key.
- Share materials like mounting board, glue guns, typography opinions, paper, and table cloths if applicable.
- Just make everything look nice. If you’re not happy with what you made, sometimes you have to fake it and make the craft surrounding your work impeccable, which goes a long way.
- Print as many supporting materials (nameplate, labels, binder covers) in black and white on the free printer as possible. Save your papercut money on nicely printed final projects; they will get expensive!
- Talk to Luanne (DS9 Monitor) about reserving shelf space to store review materials so that it’s all in one place.
Don’t
- Please, for the love of craft, do not handwrite your wall labels or binder covers. Your labels and covers do not have to be the most expressive and innovative designs ever made. Just make it look clean and professional.
- Do not wait to print from the print lab or DS9 printers until 11pm the night of reviews. Last year, both printers in the DS9 were down, and the print lab had issues due to the sheer volume of projects being printed at once.
- Do not stress if you feel like you’re the last to set up, as long as you’re not doing it the morning of reviews, I call that a win.
Do
- Free up space on your computer as you move through the semester!! You absolutely need a hard drive if you don’t have one already. I made this mistake last year and put it off until the spring, which eventually brought around large format projects/files that my computer couldn’t handle. The less space your computer has, the harder it is to save files or work on anything, costing you so much extra time! Google Drive works, but I highly recommend just getting the hard drive now so you won’t have to worry about it later (and saving your docs to both is an even better idea)!
- Assemble binders as you go, and save absolutely everything! You will need it! Professors love to see your process, it’s crucial (especially outside of the classroom, in terms of design jobs and internships, process work is everything!)
Don’t
- Don’t worry about how cohesive your review space looks! Sophomore studio is all about exploration and experimentation. It’s normal (and honestly expected) that you don’t have a concise design style. Professors are looking for creativity and range! Try everything!
- Don’t make more work for yourself than necessary! Put your all into each assignment, and think of how you can double things up strategically; for example, you could use some bitmaps you’ve created in Making as Research to design your binders.
Do
- Prepare binders in advance! Save everything and put it in there as you go. Binder sleeves and a hole puncher are your best friends. Also, start thinking about the cohesion between binder covers/spines, name tag, labels, & how you design your review space.
- Organize your google drive in a way that you can easily find your files. This includes naming conventions with a date so you know what your latest version is. I also find it helpful to have a folder for each class, and then have subfolders “week __: [project name]”.
- PACKAGE EVERYTHING! Losing your links is one of the most annoying things ever, and it reduces the quality of your work.
Don’t
- “I’ll just fix it before reviews.” Fix it as you go! You may forget about corrections, and there will be much less availability of time, resources, and materials when finals approach.
- Isolate yourself. Ask your classmates, friends, family, professors, and anyone else for help!
- Keep your files only on your desktop. Back them up to your Google Drive so you can access them if your computer breaks. Upload everything to your Google Drive daily and clear your desktop/downloads.
How did you showcase your process work
at your first review?
Angela
Maya
Julia
Caley
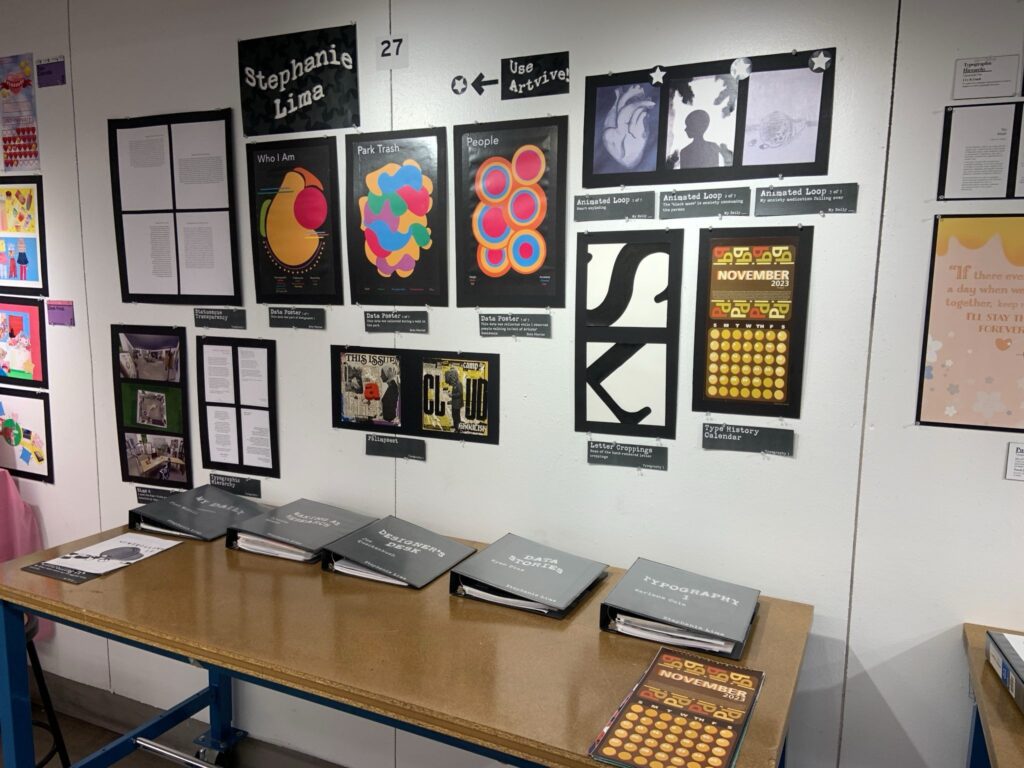
- I had a (different colored) process binder with each of the classes (5 total), organized with plastic sleeves/cover/section dividers
- Almost everything is in the process binders but there are also things that don’t fit/didn’t really have space for, so I found an unused chair and put it on the side of the table.
- All the final works are all hung on the walls (nicely organized and grouped based on assignments; with label and caption next to each assignment, with margins evenly spaced)
- Other optional things I had: black table cloth, fun astronomer plate with snacks on it.
- I had a binder for Type, Making As Research, My Daily Blanks (doesn’t exist anymore), and combined Data Stories with what used to be User Centered Design.
- I relied heavily on plastic sleeves to shove all the sketches and objects that were part of my process for each project.
- I ordered my binders to show my process from start to finish and even included critique sticky notes from my classmates.
- I made bitmaps out of geli prints I had made that semester, as black and white visuals for my binder covers and spines.
- The visuals were the same for each class’s binder, and I established a labeling system that included the class name, the professor, the class code, the semester, and my name.
- The interior of my binders had an index with the contents and had section dividers that all followed the similar visual language I established with my covers.
- I had to stand my binders up to make sure I had enough space to properly display my projects and put as many large posters on my wall.
- I presented 4 process binders, one for each course, all designed in a simple theme to unify them. I matched my labels to my binder designs the best I could.
- I used clear push pins, which are required! You don’t want colored push pins distracting from your work.
- I stood up my accordion-fold typographic letterforms and set up my physical hermit crab essay on the desk to add dimension + interactivity to the space.
- I drew out a blueprint of how I wanted to arrange everything, so I wouldn’t have to worry about it day-of. Decide on what you want your focal point(s) to be ahead of time.
- I centered my name on the wall, in the top-middle of my display.
- Design your spines!!!
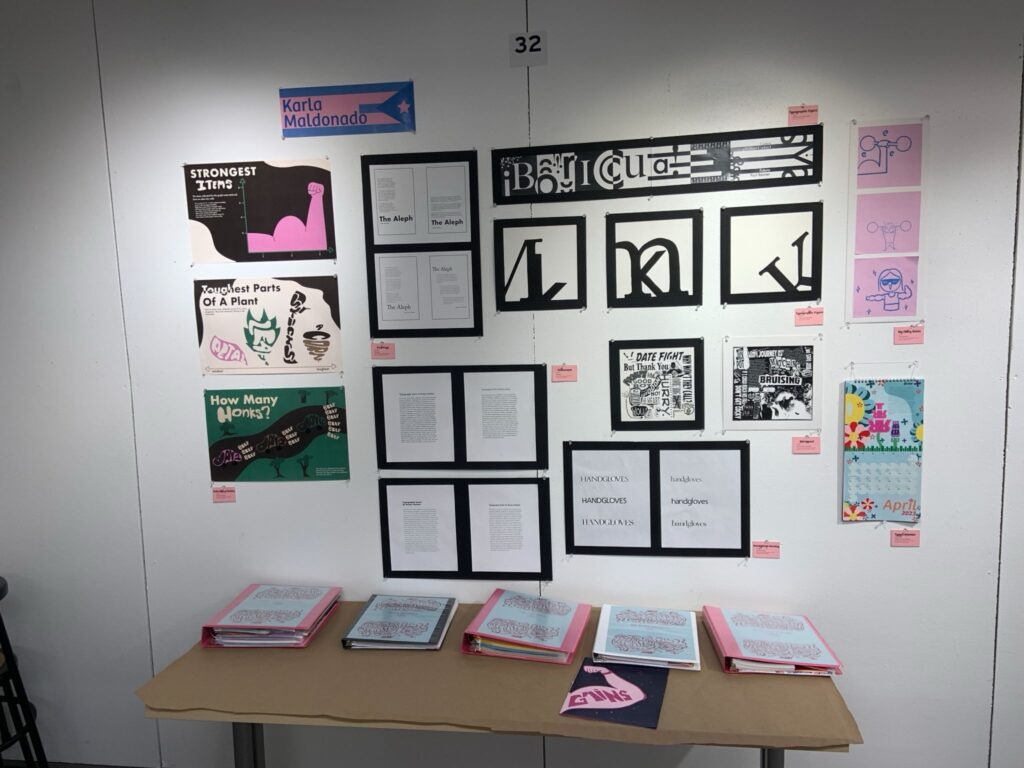
- I had 5 process binders for each of my classes and organized my work in chronological order
- Used project sheets as dividers for each assignment
- I put everything in my binders, 3” full
- Used binder sleeves for everything. Makes it thicker, easier to flip through, and protects your work better than hole punching.
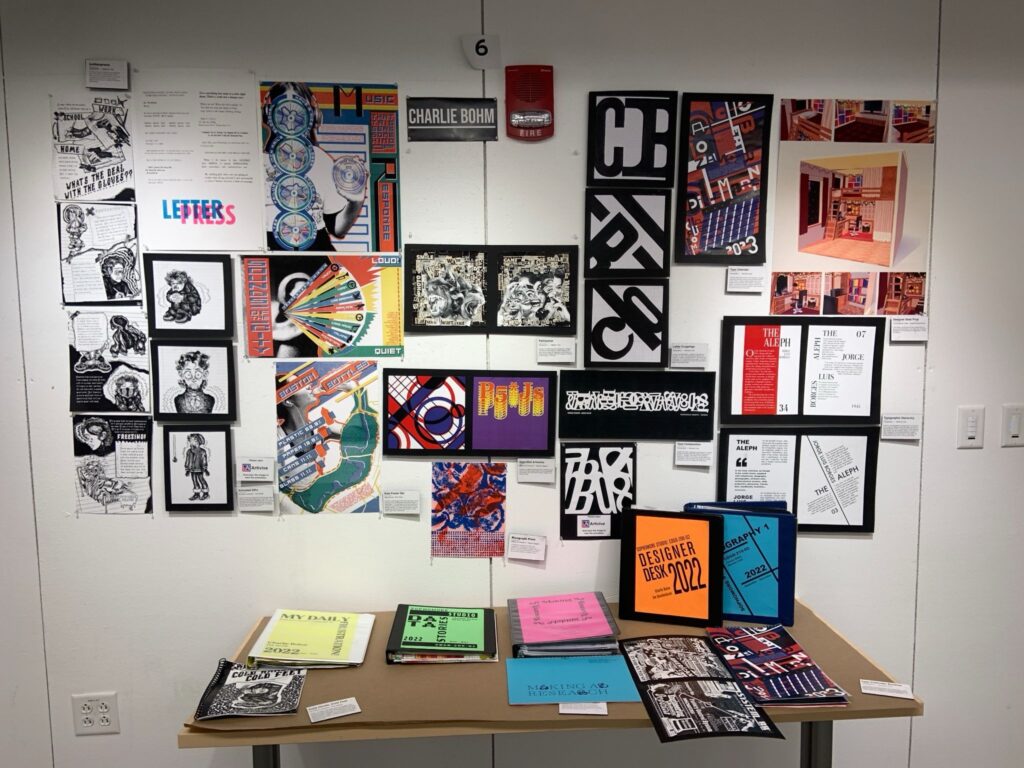
- My binders, process books, and essays were on the table, but the majority of my work was hung on the wall to utilize the space as much as possible
- Largest pieces highest on the wall, smallest pieces lowest
Your Sophomore Review Guide
Review Basics
Reviews are a crucial part of your design education at MassArt. They help you organize your projects, reflect upon your work, and hone your presentation skills. They also give you a chance to get valuable feedback from outside critics. Feedback is designed to give you a fair assessment of where your work is at this particular moment in time. It’s just another way to get a sense of how you’re progressing. Your grades are another. Combined, they should help you make any adjustments necessary so you can have an even more successful semester.
What you need to do
- Install your work in your assigned space in the DMC.
- Add your work to the google drive folder.
- Complete your review form in your google drive folder.
- Pick up your work and clean your space by 4pm on Monday so that the juniors can begin installing their work.
Installing your work
You may begin installing after 7PM the evening before and you must leave the DMC space before 9am on Monday.
Please show ALL your work and process from Typography I and all four sections of Sophomore Studio.
For your table
- Your space will include a table and wall space.
- Take care planning and setting up your space
- Have your name printed and mounted to clearly identify your work
- Design and print labels for each of your pieces
For the Google Drive
- Prior to reviews, each student will receive a link to their dedicated review folder.
- You will receive a by-class checklist of assignments to include.
- Be diligent with naming conventions
- All files should be less than 25mb
- For the love of all that is good and holy, no sub-folders
For your review form
- Prior to reviews, complete the Self Assessment in your folder.
- Take your time and be thoughtful with your responses!
- It shapes how we assess your work.
Pickup
You can return between 3:00 pm and 4:00 pm to pick up your work. You must pick up your work before 4:00 pm as juniors will be installing their work. Please clean up your space and leave it as you found it. Any work not removed by 4:00 pm will be removed by the Junior whose space you are occupying.